To install greenhouse film well, choose a calm, mild day, check the frame for sharp edges, put the film on the right way round, and fix it evenly and tightly along every edge. Then keep it tight: re-check fixings after the first hot spell and after storms. Repair small tears quickly with greenhouse repair tape on clean, dry film. Plan to re-skin once the film is torn in many places or has reached the end of its service life.
A good installation often matters as much as the film itself. Loose or damaged film flaps in the wind, wears against the frame and tears sooner. This guide covers the steps that most affect how long a cover lasts on Australian polytunnels and greenhouses. If you haven’t chosen a film yet, start with how to choose greenhouse film.
What should I check before installing film?
- Frame condition: look for burrs, sharp bolt ends, rust or rough welds where the film will touch, and smooth or cover them. Many growers tape the hoops where the film rests so that hot steel and rough spots don’t damage it.
- Square and straight: hoops and end frames should be straight and evenly spaced so the film sits flat without creases.
- Fixings ready: have your fixing channel, clips, wire or tunnel rope laid out before you unroll the film.
- Enough people: wide commercial rolls (such as 11.2m film) need a team, with people on both sides of the tunnel.
- Right size: measure over the hoop from ground fixing to ground fixing, and add extra for fixing at the sides and ends.
When is the best time to install greenhouse film?
Choose a calm day with mild temperatures. Wind makes wide film very hard to control and can tear it before it is fixed. Plastic film expands in heat and contracts in cold. Film fitted on a very cold day can be over-tight in summer, and film fitted in the heat of the day can loosen as it cools. Many growers install in the morning once the dew has dried. Always follow any installation instructions from the film manufacturer.
How do I install film on a polytunnel?
- Check which side faces in. Many films have an inside and an outside, especially films with anti-drip or other coatings. Look for printing or markings on the film and follow the manufacturer’s instructions. A coated film fitted the wrong way round will not work as intended.
- Unroll along the tunnel. Unroll the film down one side of the tunnel, keeping it clean and off sharp ground.
- Pull it over evenly. With people spaced along both sides, pull the film over the hoops, keeping the edges straight and the film centred.
- Fix one end, then tension towards the other. Secure one end, then work along the tunnel pulling the film firm and even before fixing the second end.
- Fix the sides. Fix the sides into channel or rails, or bury them, working from the centre outwards and keeping even tension so no wrinkles form.
- Finish the ends and doors. Fold and fix the ends neatly so wind can’t get under the film.
On multi-span tunnels and structures with roll-up sides, the steps are similar, but follow the fixing method designed for your structure. Rope tied over the film between hoops is a common way to stop it lifting in wind.
Why does film tension matter?
Tight film sheds wind and rain. Loose film flaps, and every flap rubs it against the frame and fixings. That wear is one of the most common reasons covers fail early. Film also tends to relax after its first hot days, so check and re-tension the fixings after the first warm spell, then regularly through the season and after every storm.
How do I repair a tear in greenhouse plastic?
- Act quickly. Wind gets into small tears and makes them bigger, so repair them as soon as you see them.
- Clean and dry the area. Wipe dust, dirt and moisture from both sides of the film around the tear. Tape won’t stick well to dirty or wet film.
- Use greenhouse repair tape. Use a clear, UV-stabilised tape made for greenhouse film. Ordinary packing or duct tape breaks down quickly in Australian sun.
- Tape both sides if you can. Overlap the tear well on all sides, press the tape down firmly and smooth out air bubbles. Round the corners of the patch so they are less likely to lift.
- Find the cause. Check whether the tear came from a sharp edge, a loose fixing or a rubbing point, and fix that too, or the film will tear again in the same place.
When should I replace the film rather than repair it?
- Tears are appearing in many places, or patches keep failing.
- The film has become brittle, cloudy or discoloured. These are signs it is reaching the end of its UV-stabilised service life.
- Large sections are damaged after a storm.
- Light transmission has dropped noticeably and is affecting the crop.
Plan re-skinning for a time that suits your crop cycle and the weather, and order film early so it arrives before you need it.
How should I store greenhouse film?
Keep rolls in their packaging, out of direct sun, off the ground and away from sharp objects, chemicals and heat sources. Store them flat or as the supplier recommends, and use older stock first. UV stabilisers protect film once it is in use, but long periods in the sun before installation still shorten its life.
Film, fixings and repair parts from Oz Bunji
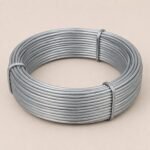
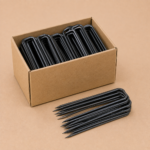
Oz Bunji supplies 180 micron berry film and 200 micron greenhouse film in commercial roll sizes, PP tunnel rope, polyester wire and twine, and a repair kit for 9m x 51.5m greenhouses, alongside greenhouse structures and parts. Still planning a build? Compare greenhouse vs polytunnel, and add shadecloth for summer heat.
Need help working out how much film you need? Contact Oz Bunji with your structure dimensions for a quote.